ATMega32 Tutorial Series 2- (configuring USBasp with atmel studio)
To proceed with this article, you need to have configured atmel studio and USBasp drivers correctly. This tutorial is based on this article.
Step 1: Compilation Tool Chain
- Go to Tools > Options > ToolChain & Select the type of toolchain which is Atmel AVR 8-bit in our case.
- Click Add Flavour, then set a desired package name
- In the Package base path field, you need to specify the installation directory of WINAVR
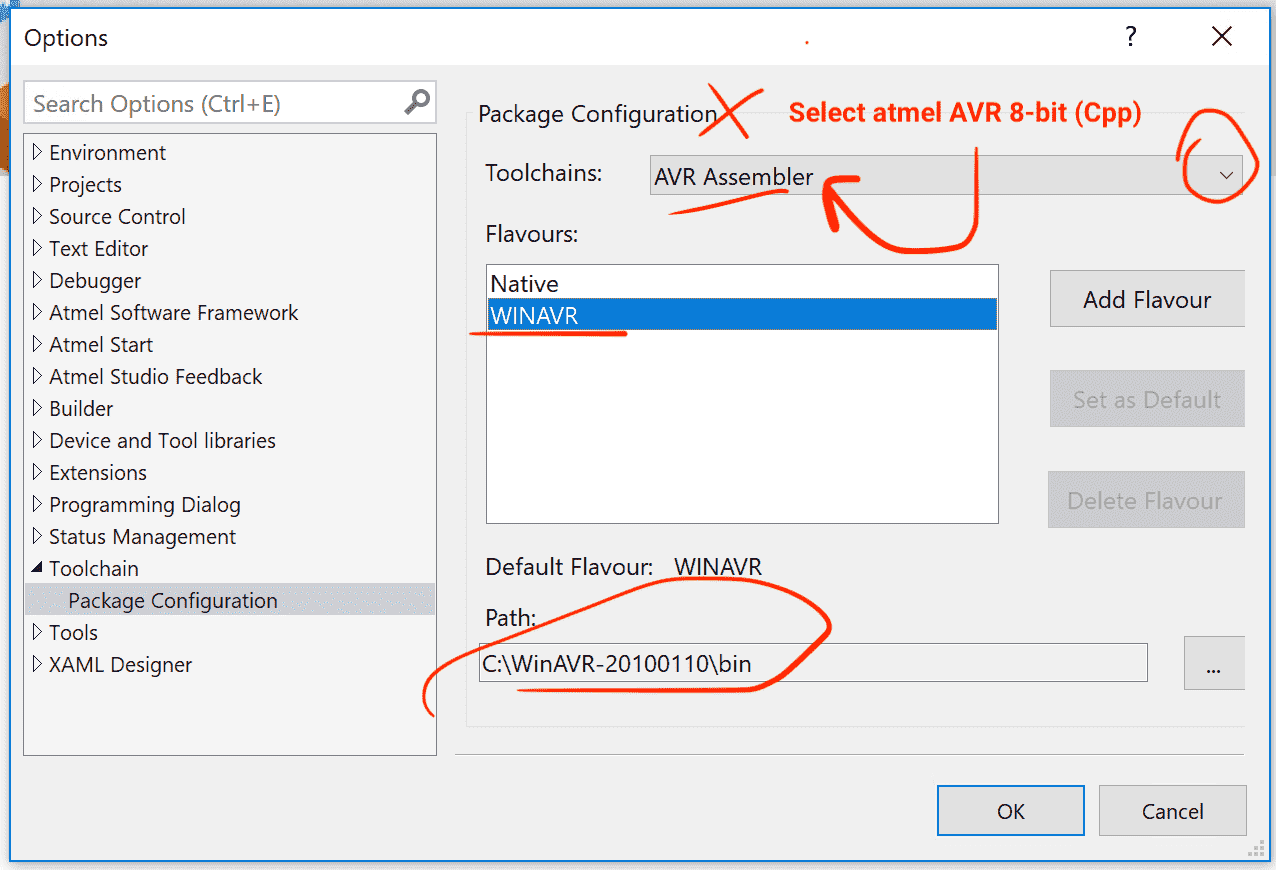
- Since we'll be using WINAVR with our USBasp in would be convenient for future use by setting it to the default toolchain.
Step 2 : Adding USBasp as a shortcut
In this step we're setting up an external tool so that we won't need to type in the command line window everytime we want to load the hex file to the MCU.
- Goto Tools -> External Tools
- Add a new menu tool by giving a title and providing the path of
avrdude.exe - And the arguments given should be
avrdude -c usbasp -p atmega32 -U flash:w:$(ProjectDir)Debug\$(TargetName).hex:i
- Tick the
use output windowoption
if you're using a different MCU (say atmega328p) then you need to change the above code to the relevant MCU name.

Step 3: Testing a sample code
Note : If you don't have the AVR Minimum System board fro ATMega32, this picture shows how the connections needed to be done, in order to program it on a breadboard.
