Atmega328p interfacing with a breadboard
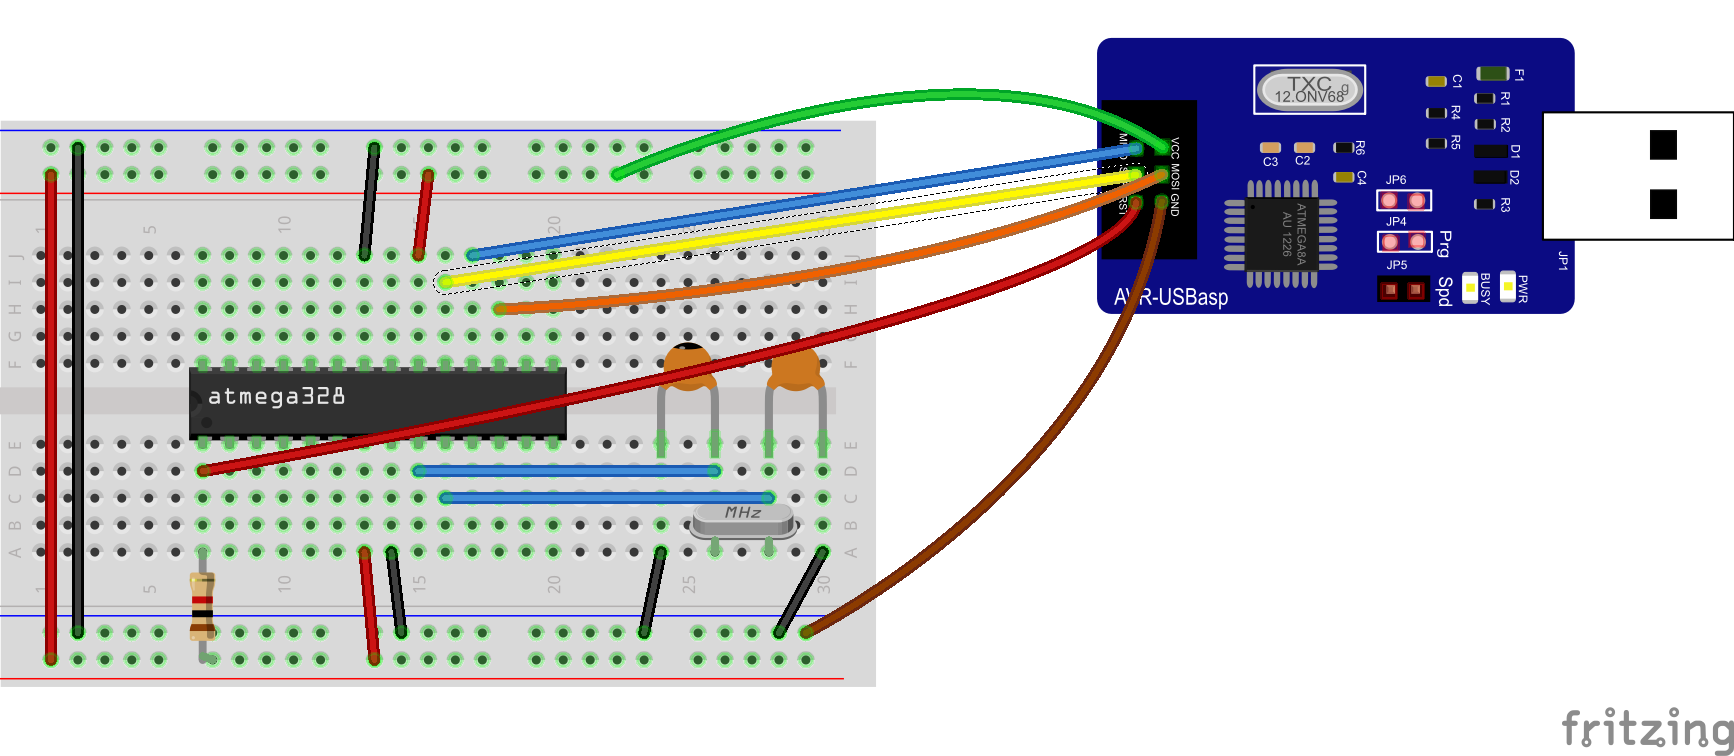
The same tutorial for the ATMega32 can be used (changing only the IC in the Project along with the external tools) to program a ATMega328p even without the minimum system board, according to the following Diagram.
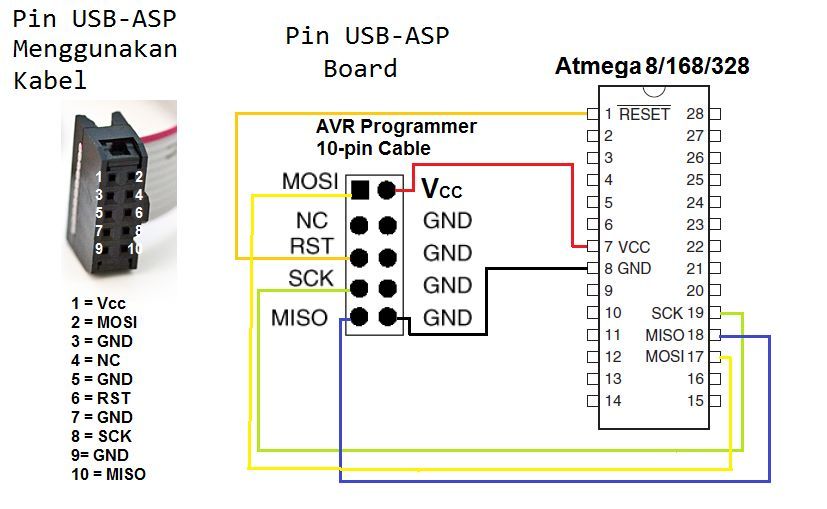
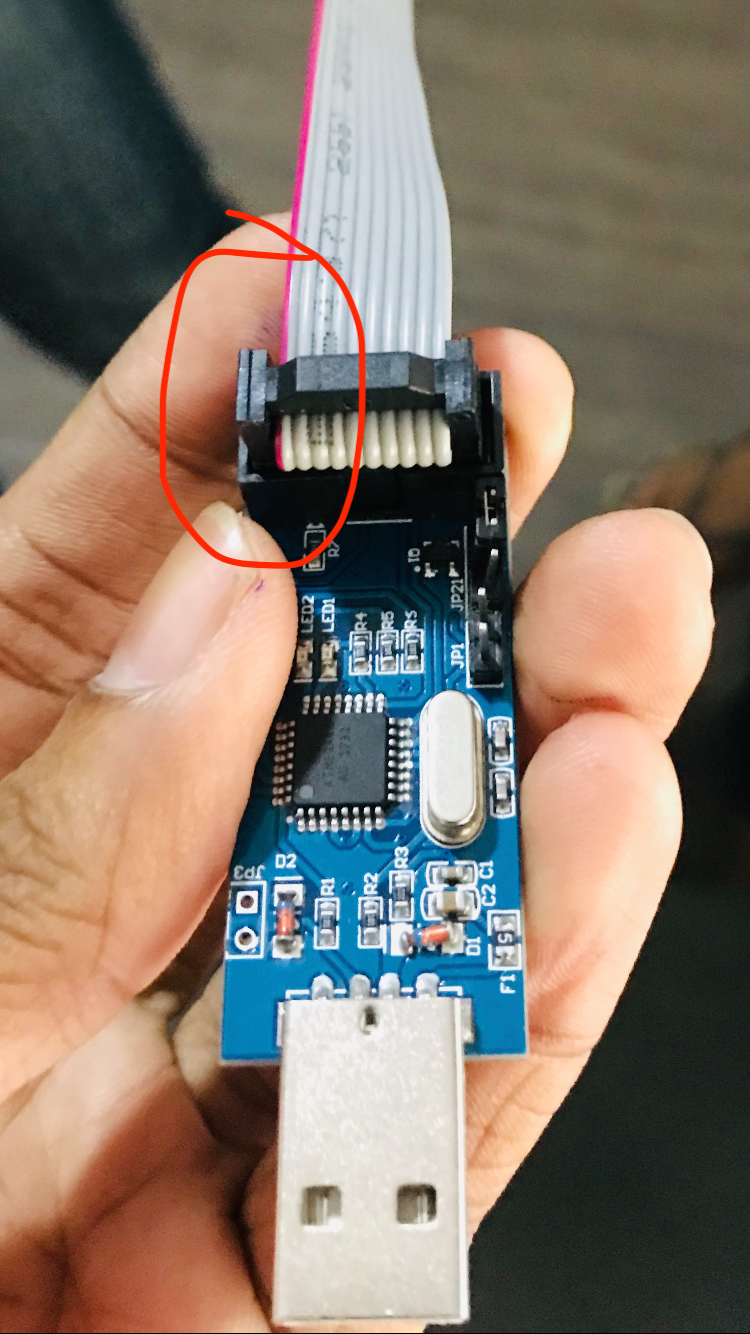
( *important* as many have suggested please check whether the Pink line in the cable is connected to the VCC of the USBAsp)

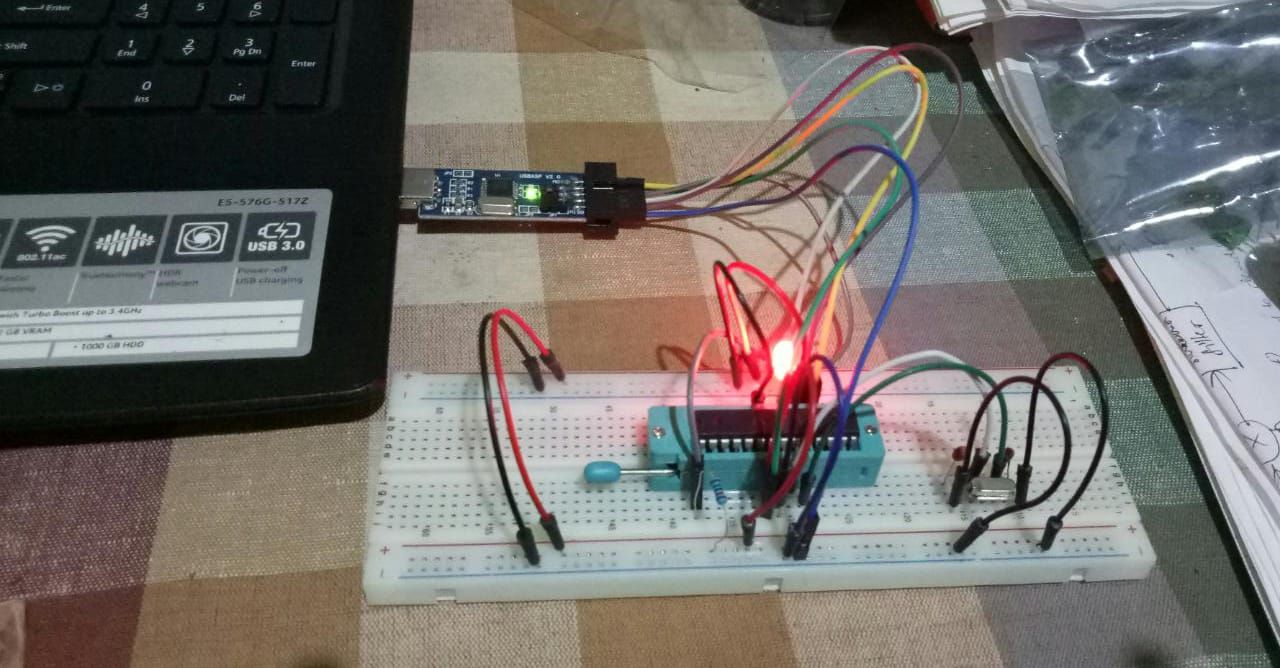
In Reality ->